So what’s new this week?
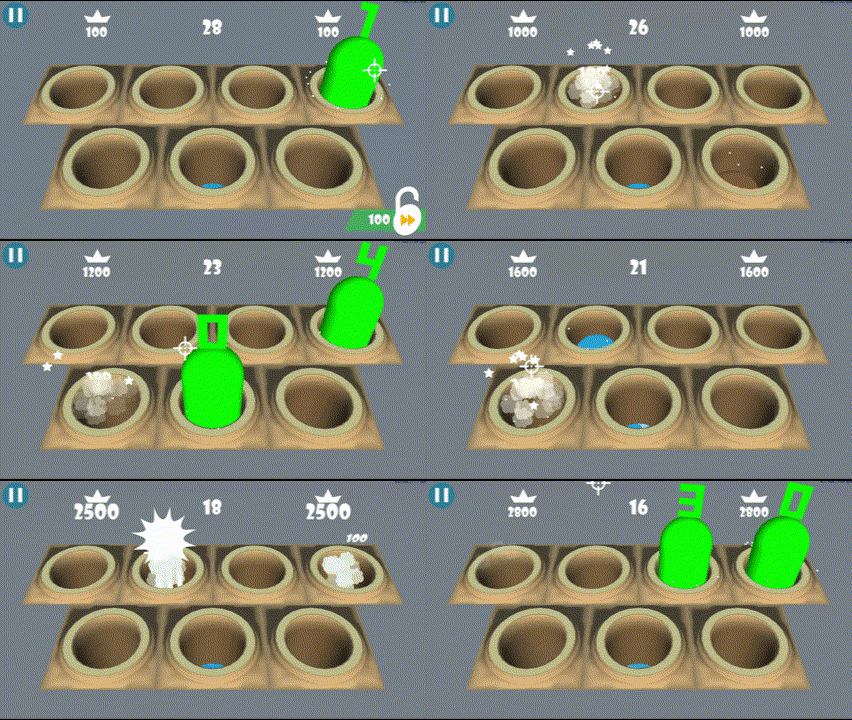
After I updated last weeks Devblog, I was compelled to add those vfx for the ingame targets. It took about an hour to add them in the correct places, and reduce the streaks a little bit, as they were always a little large. Now, popup pebbles, animate down dust puffs and down streaks were all added, to give consistency across the game.
Now that I had a bunch of target types and a Boss, plus a whole bunch of tweak-able game settings, I decided to make a clear plan of the GamePlay Progression, so that I could begin to lay out the basic levels.

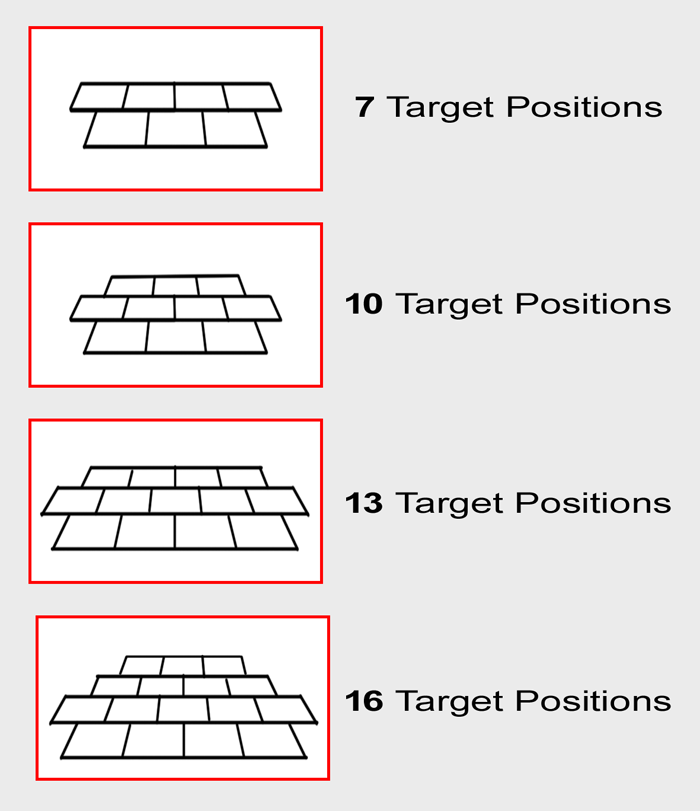
My initial idea was to use several different grid layouts to contain the target positions, which increased in grid size over the game stages. Returning to Unity and my modelling program, I exported the prototype game level, and had an experiment with grid layouts.
I determined that I really liked the original 7 target position grid as a beginner grid, and by keeping the grid fairly ‘landscape’ in proportion, I could increase it incrementally, to a 10, 13 and 16 target position grid, which kept targets collisions large enough to be easy to hit, while target detail remained large enough to remain visually appealing.

My game design mantra was to ‘keep it simple’. While I am an experienced game artist, I am learning game design, so I wanted to keep as much of the game project’s design scope as simple as possible.
Regarding simplicity. One thing you may note about the game is that I wanted to avoid using text. I believed that using other art and design elements, like a clever use of colour, shape and symbols, would express enough simple information to the player, that I didn’t need to use text. Of course, having no text meant that more complex ideas like stage progression, would need a thoughtful approach. I already added arrow and ellipse banner that animated at the beginning of each stage, so when I created the stage unlock icon, it was designed with the banner in mind, to create a visual link in concepts for the player.
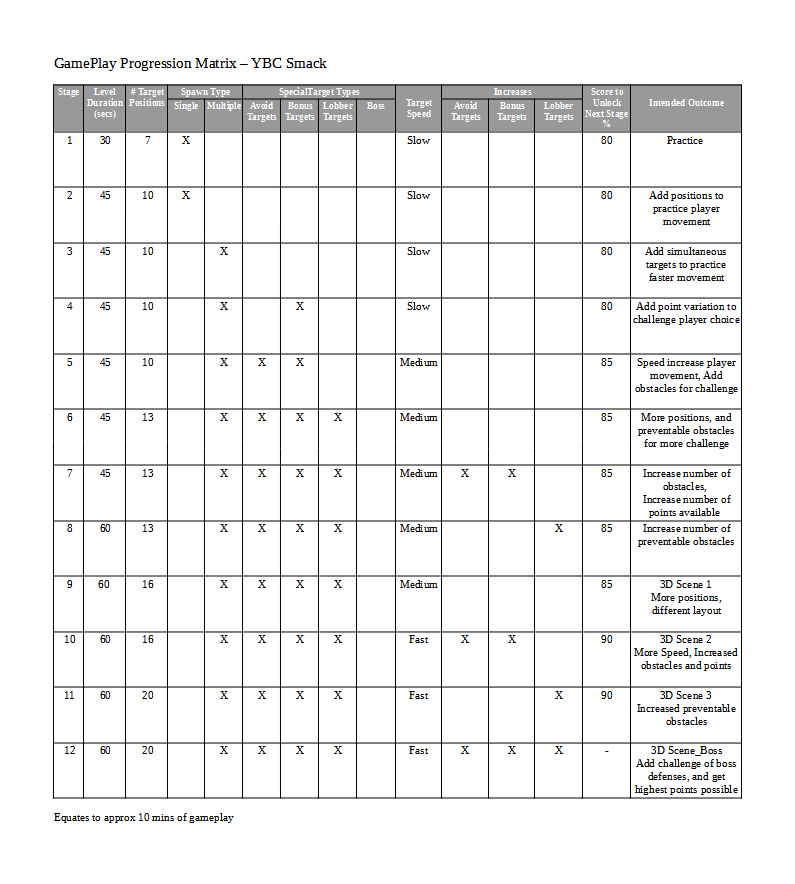
Next – using LibreWriter, I created the first-pass GamePlay Progression matrix.

Basically, I began planning the gameplay progression by adding a short 30 second stage to be utilised for getting the player used to the rules and simple mechanic – if the playable main menu wasn’t obvious enough.
I also needed to consider values required for Stage Unlocking, which required a ‘percentage of available target points’ to unlock the next stage, so while hitting the targets was the primary goal, the player would soon realise the importance of scoring enough points to unlock the next stage. I probably aimed a little high with these values, 80% and higher, my gut says 75% but I can fix them during balancing.
This ‘available target points’ value is determined by an equation, that considers the level time, target speeds, special target ratios – which determine the number of special targets spawned, and target values. If player’s score more than ‘x’ percentage of this value, the next stage unlocks.
Next, I documented how I would systematically increase my Stage Manager settings, to create more challenging stages. The categories I used were:
- stage duration,
- the number of target positions a target could spawn at,
- Single or Multiple targets,
- Special Targets like Avoid (obstacles), Bonus (higher points) or Lobber (preventable obstacles),
- target speeds,
- increases to Special Target ratios, ie: adding more of a Special Target type, Stage Unlock values,
- Stage Set types – grid (visually ordered targets) or scene (visually scattered targets)
This was the first-pass, and I fully expected that some settings will change, but it was a great starting point – from my initial prototype stages, created for target testing and feature implementation, to turning these elements into a simple but challenging, playable demo game.
I was also quite happy to see my design tips document saved me a chunk of time again today, assisting me with remembering some distant debug changes I made. “Remember to document often.“
DESIGN UPDATE: Adding my initial GamePlay progression stats to the game, very quickly displayed areas that need tweaking. Where it only took a few hours to update the Stage Manager’s 5 prototype levels, to 12 levels, with 4 different grid layouts, much more time was spent going deeper into each stage, playing and replaying, and then adding and tweaking settings, until each stage had the right amount of variation and interest, and incremental challenge. I could immediately see where changes were required, and added these tasks to the to-do list. By the end of day, I had the first 2 stages balanced to a point where I was happy with them, 6 new design bugs/tasks to attend to, and all the 12 stages roughed in, ready for balancing and a second playtest. Pretty pleased with this result.